What it does
An Inovelli Blue exposes around forty configuration entities through ZHA: LED bar color and brightness, ramp rates and dimming speeds, paddle behavior, double-tap levels, default and start-up levels, and the wiring and load settings. This script lets you nominate one switch as the source of truth, tick the settings you want copied, and write the differences to every other switch of the same model.
It runs as a test run by default, so the first thing it does is tell you exactly what it would change, on which switches, without touching anything.
Before you start
- Home Assistant with the ZHA integration and your Inovelli Blue switches already paired.
- A way to edit files in your Home Assistant configuration folder. That is step 1 below.
Installing it
1 Install a file editor add-on
You need to be able to create a file inside your Home Assistant configuration folder. The easiest way is the Studio Code Server add-on, which is Visual Studio Code running inside Home Assistant. The File editor add-on works too if you prefer something lighter.
Install it from Settings › Add-ons › Add-on Store. There are plenty of walkthroughs on the web if you have not set one up before — searching for “Home Assistant Studio Code Server add-on” will find them. Everything from here on happens inside that editor.
2 Turn on packages in configuration.yaml
Open configuration.yaml and check whether it already has a
homeassistant: block with packages: under it. If
it does, skip to step 3. If it does not, add this at the end of the file:
homeassistant:
  packages: !include_dir_named packages
patternWarning in the Problems panel. That is the
YAML schema checker not recognizing Home Assistant's
!include_dir_named tag. The line is correct and Home
Assistant will load it fine.
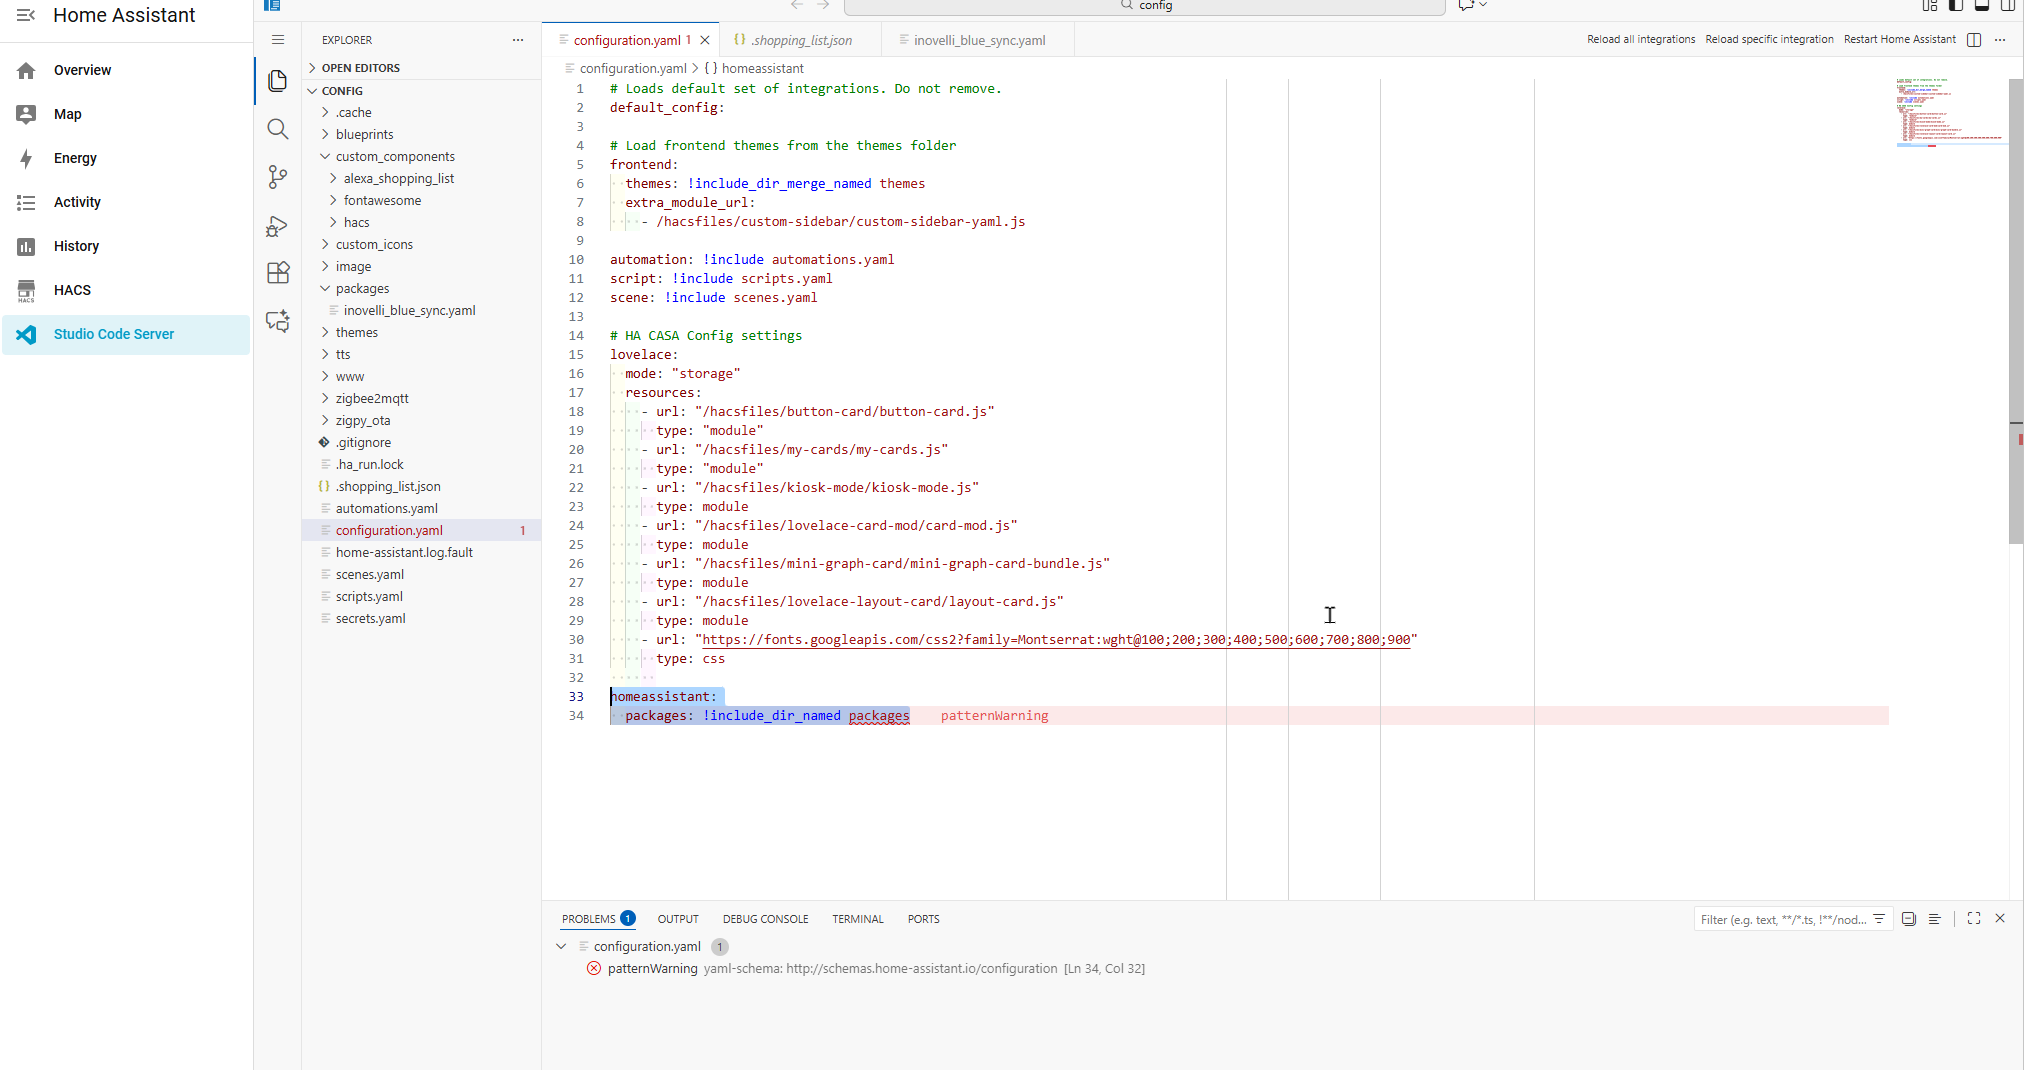
configuration.yaml,
with the warning that can be ignored.
3 Create the packages folder
In the file tree on the left, look for a folder called
packages next to configuration.yaml. If it is
not there, right-click in the empty space of the file tree, choose
New Folder, and name it exactly
packages.
4 Create inovelli_blue_sync.yaml
Right-click the packages folder, choose
New File, and name it
inovelli_blue_sync.yaml. Leave it open and empty — the
next step fills it in.
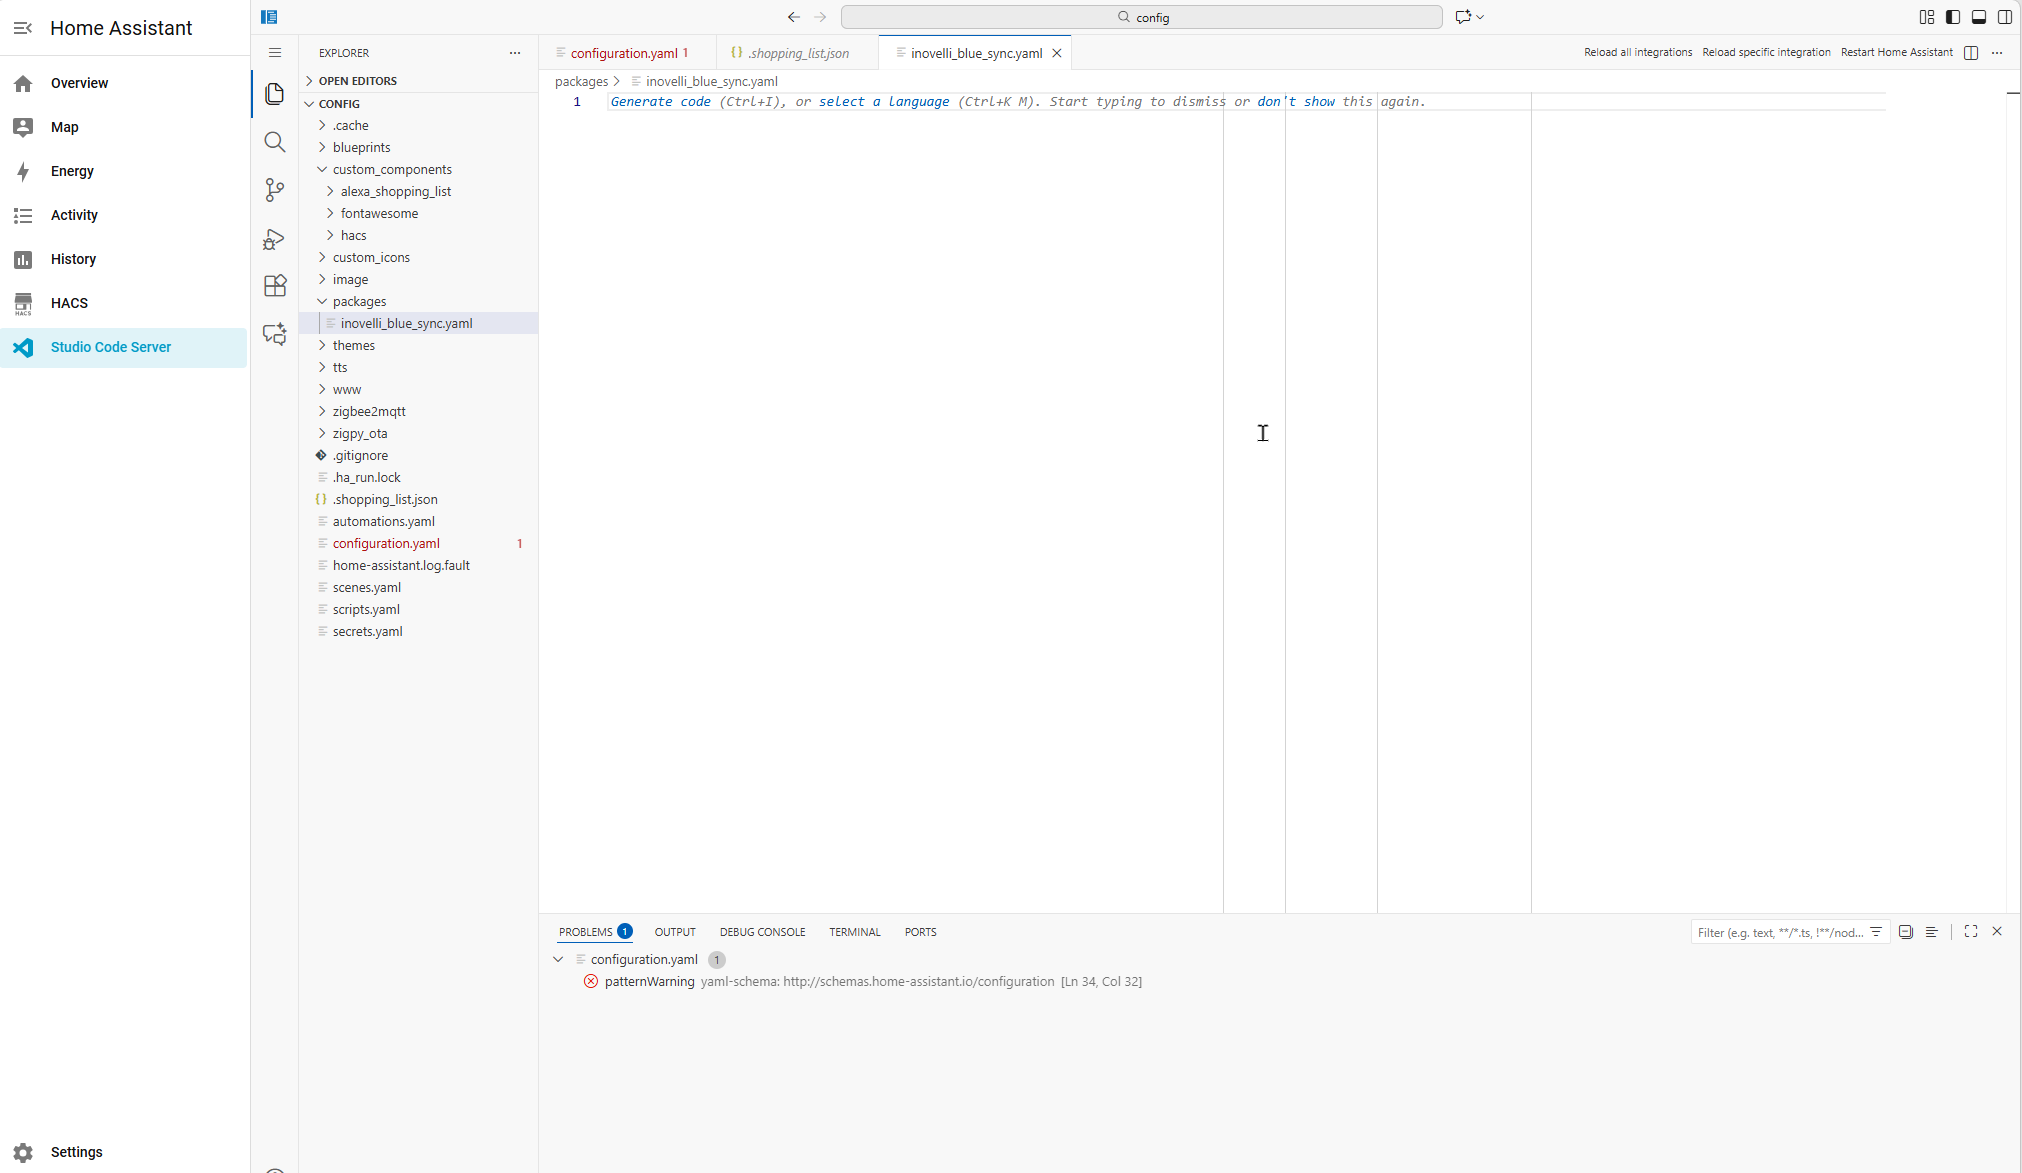
packages.
5 Copy the script in
Press the Copy button at the top right of the box below,
then click into your empty inovelli_blue_sync.yaml and paste.
Save the file with Ctrl+S
(⌘+S on a Mac).
Loading the latest version from GitHub…
This is pulled live from the main branch, so it is always the
current version. You can also
open the raw file directly.
patternWarning entries and
Device ... does not exist notices. Those come from the same
schema checker, which does not understand Home Assistant's templates or
device pickers. Nothing there needs fixing.
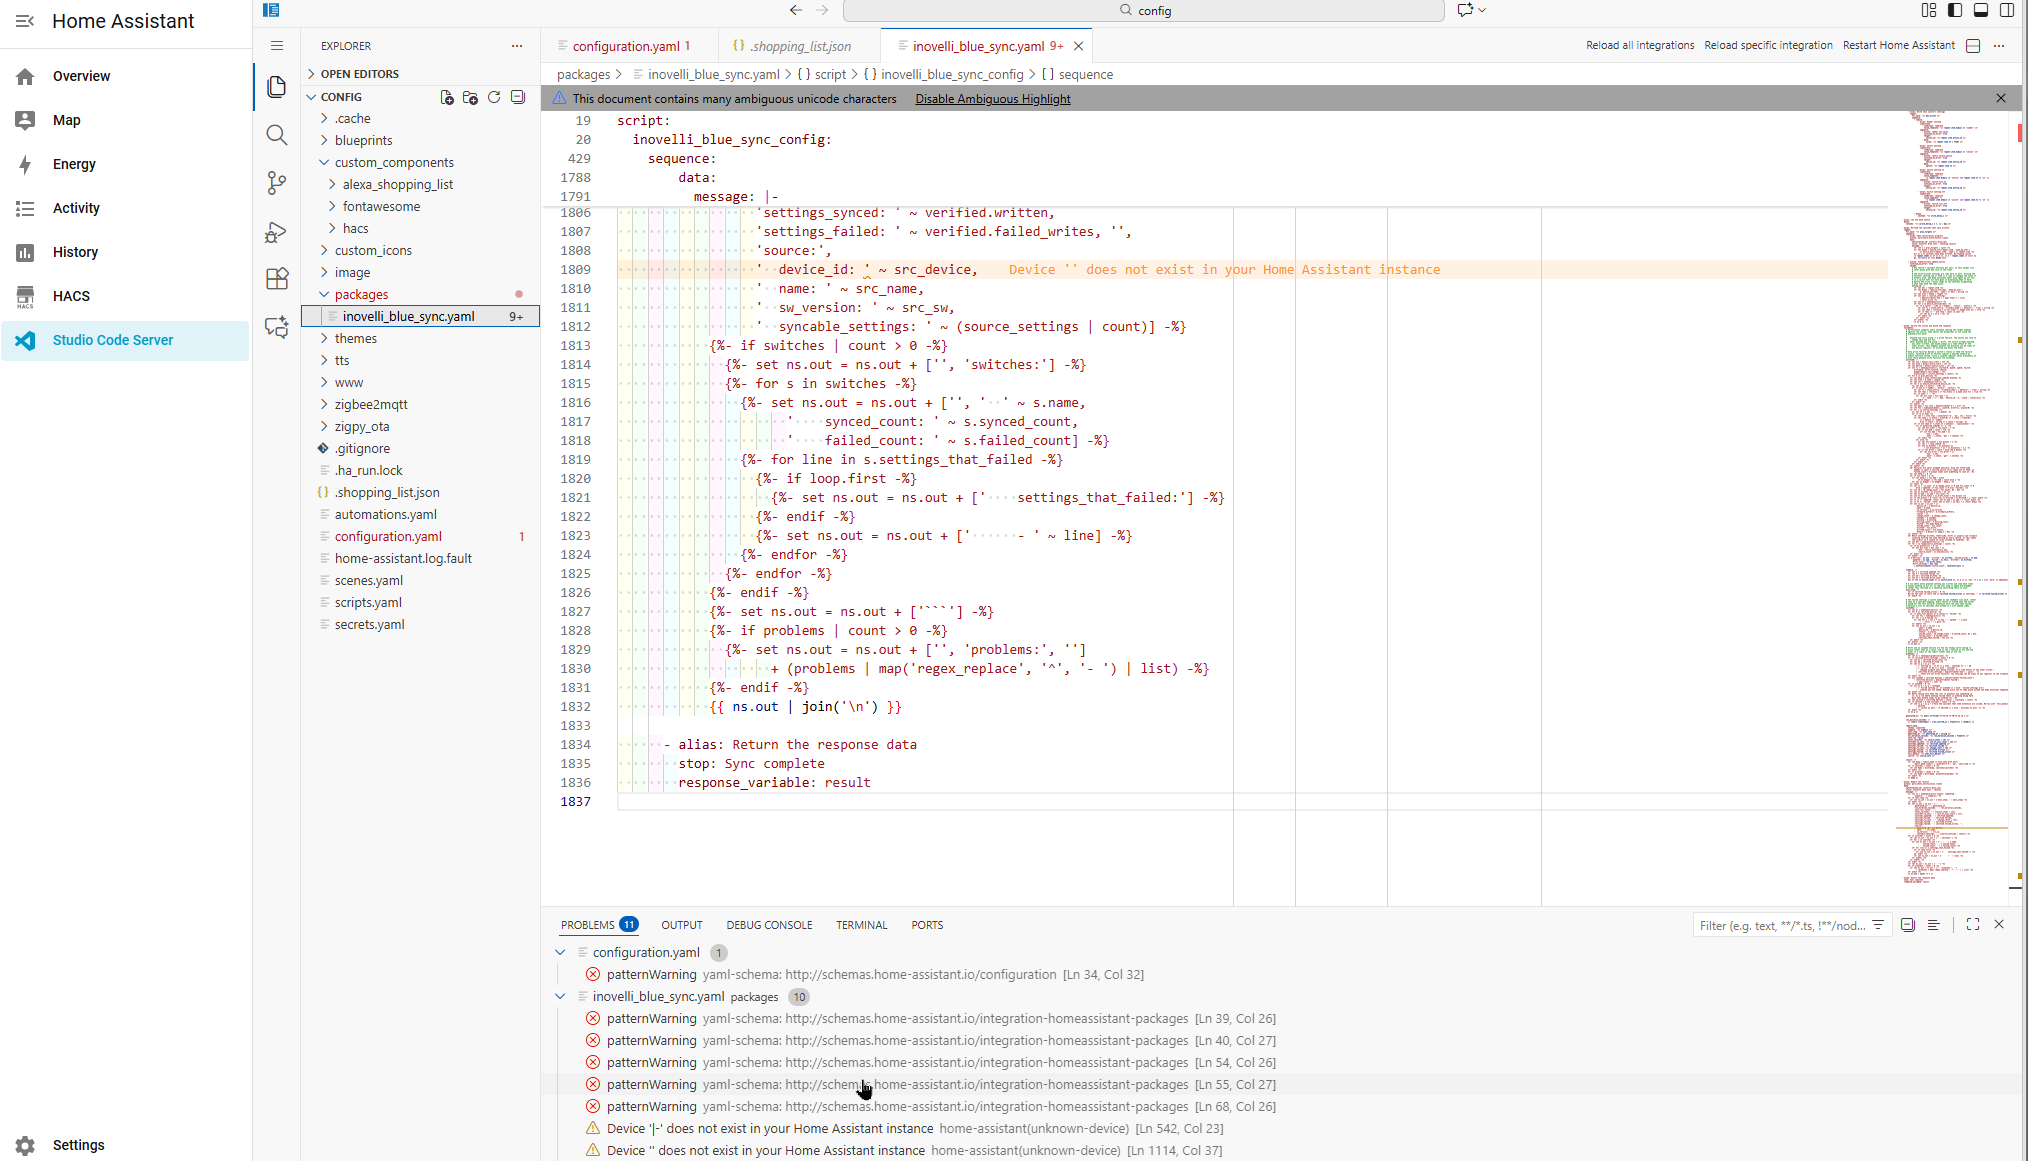
6 Load it into Home Assistant
Which of these you need depends on whether you had to add the
packages: line back in step 2.
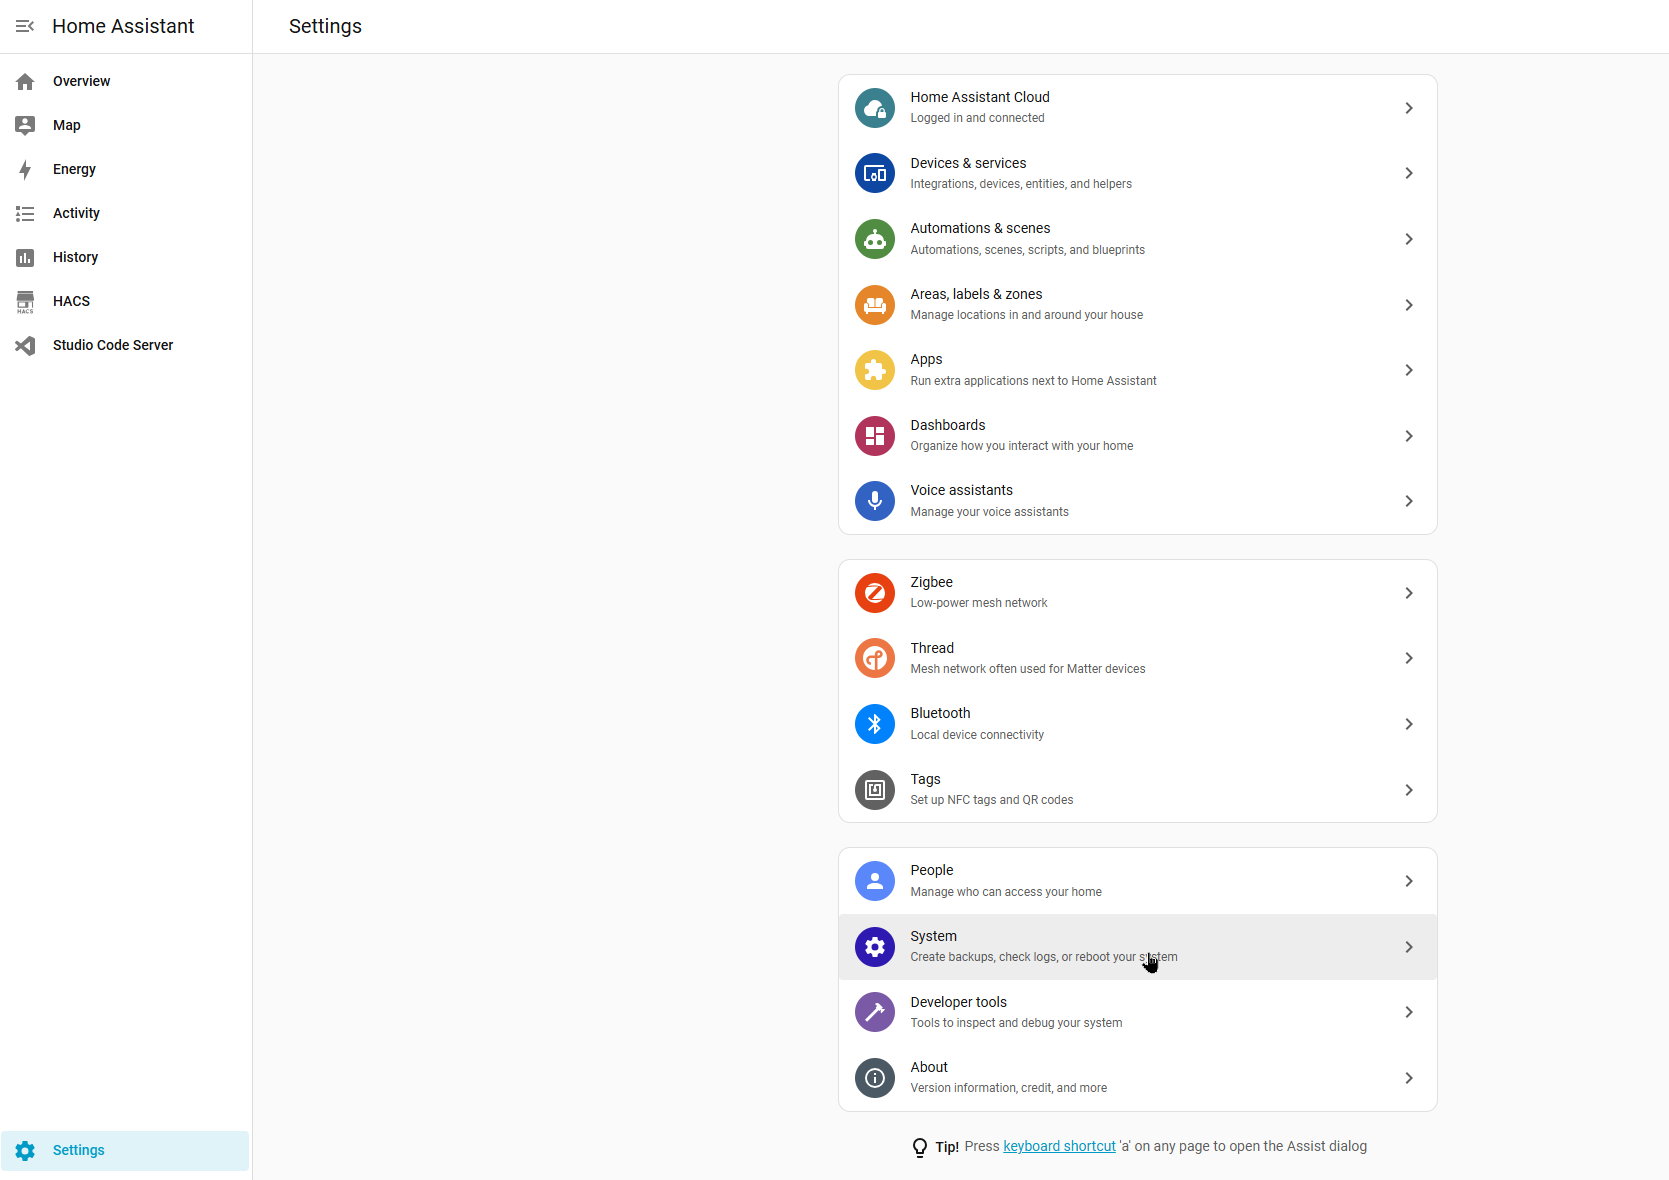
A. Restart
If you added the packages: line in step 2.
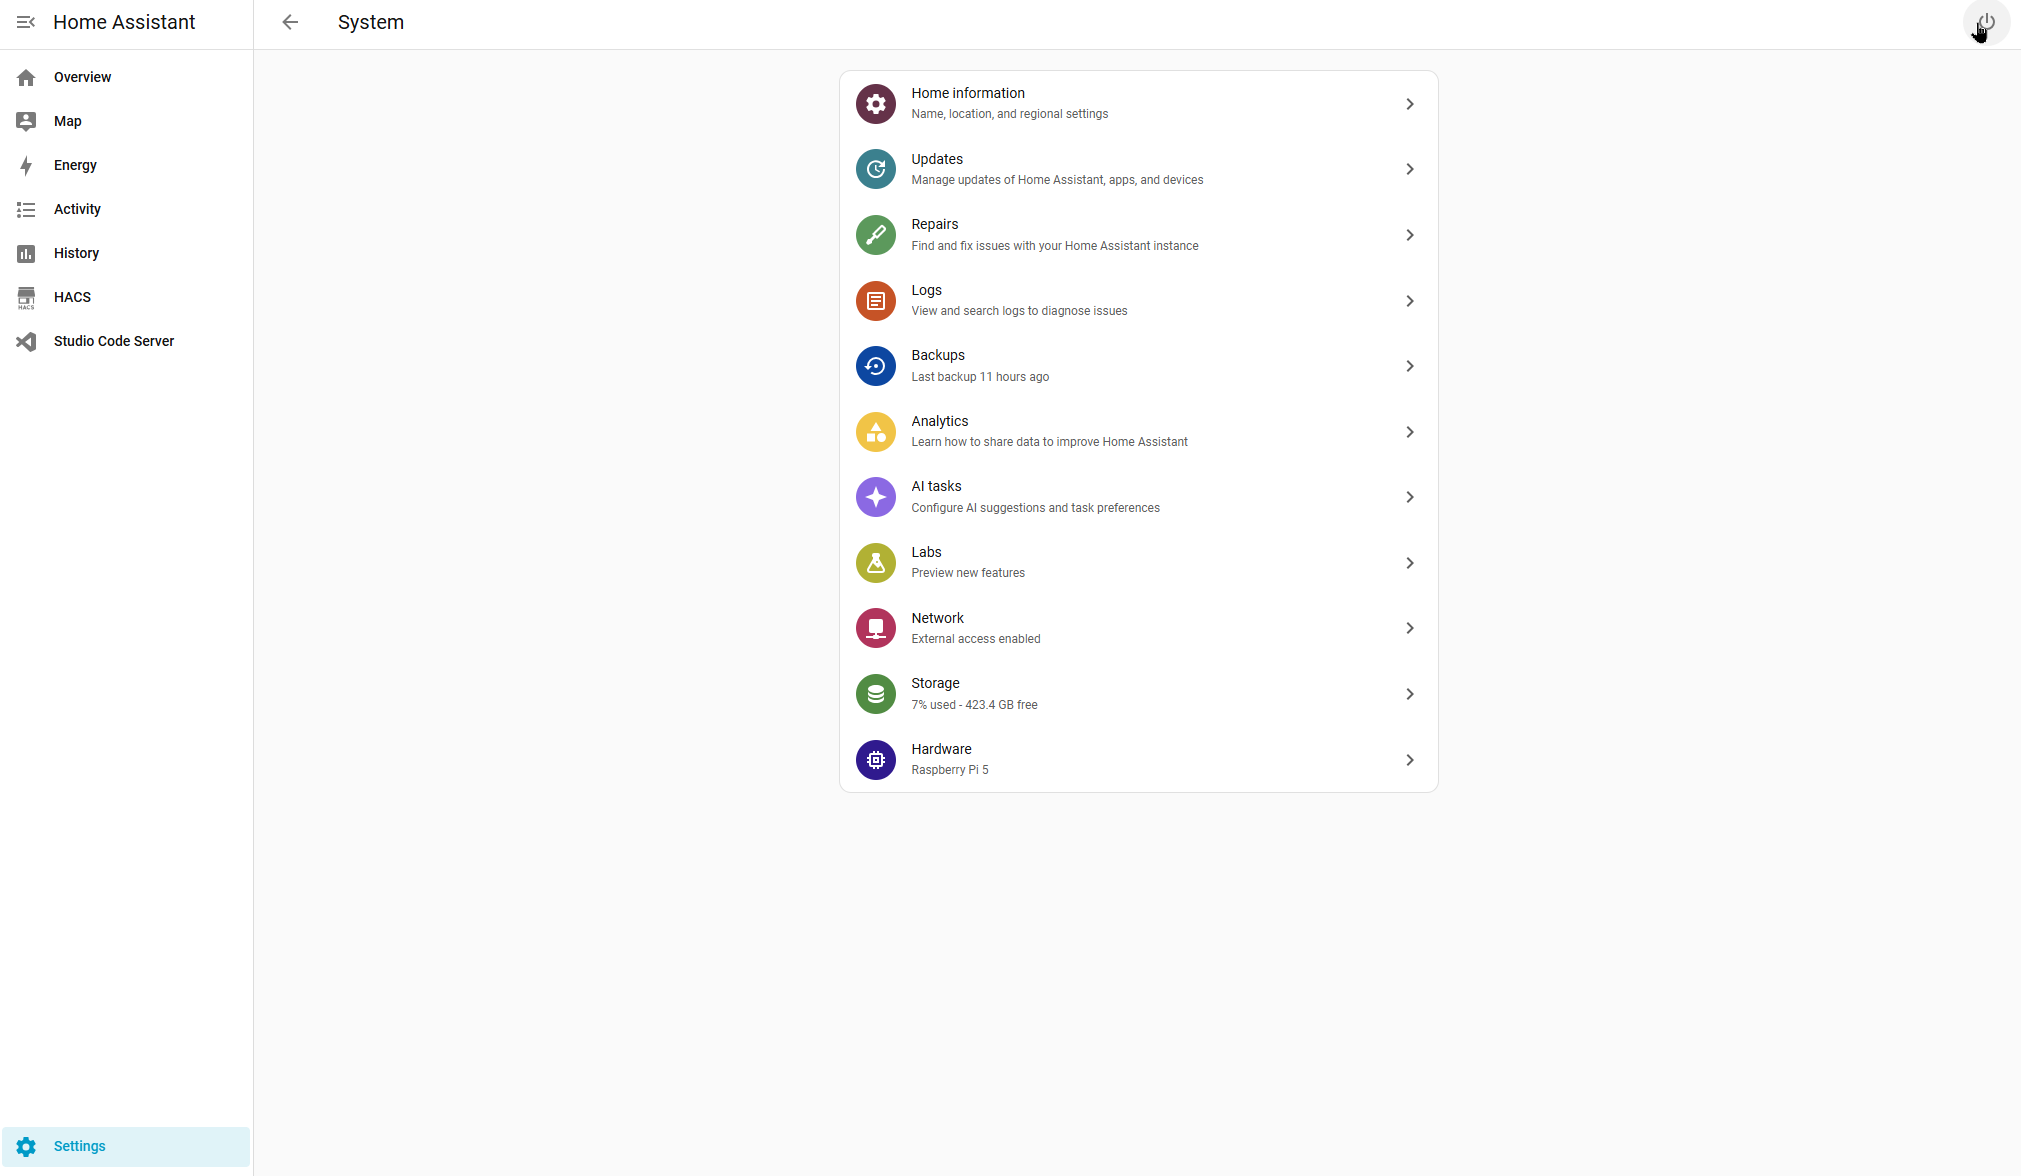
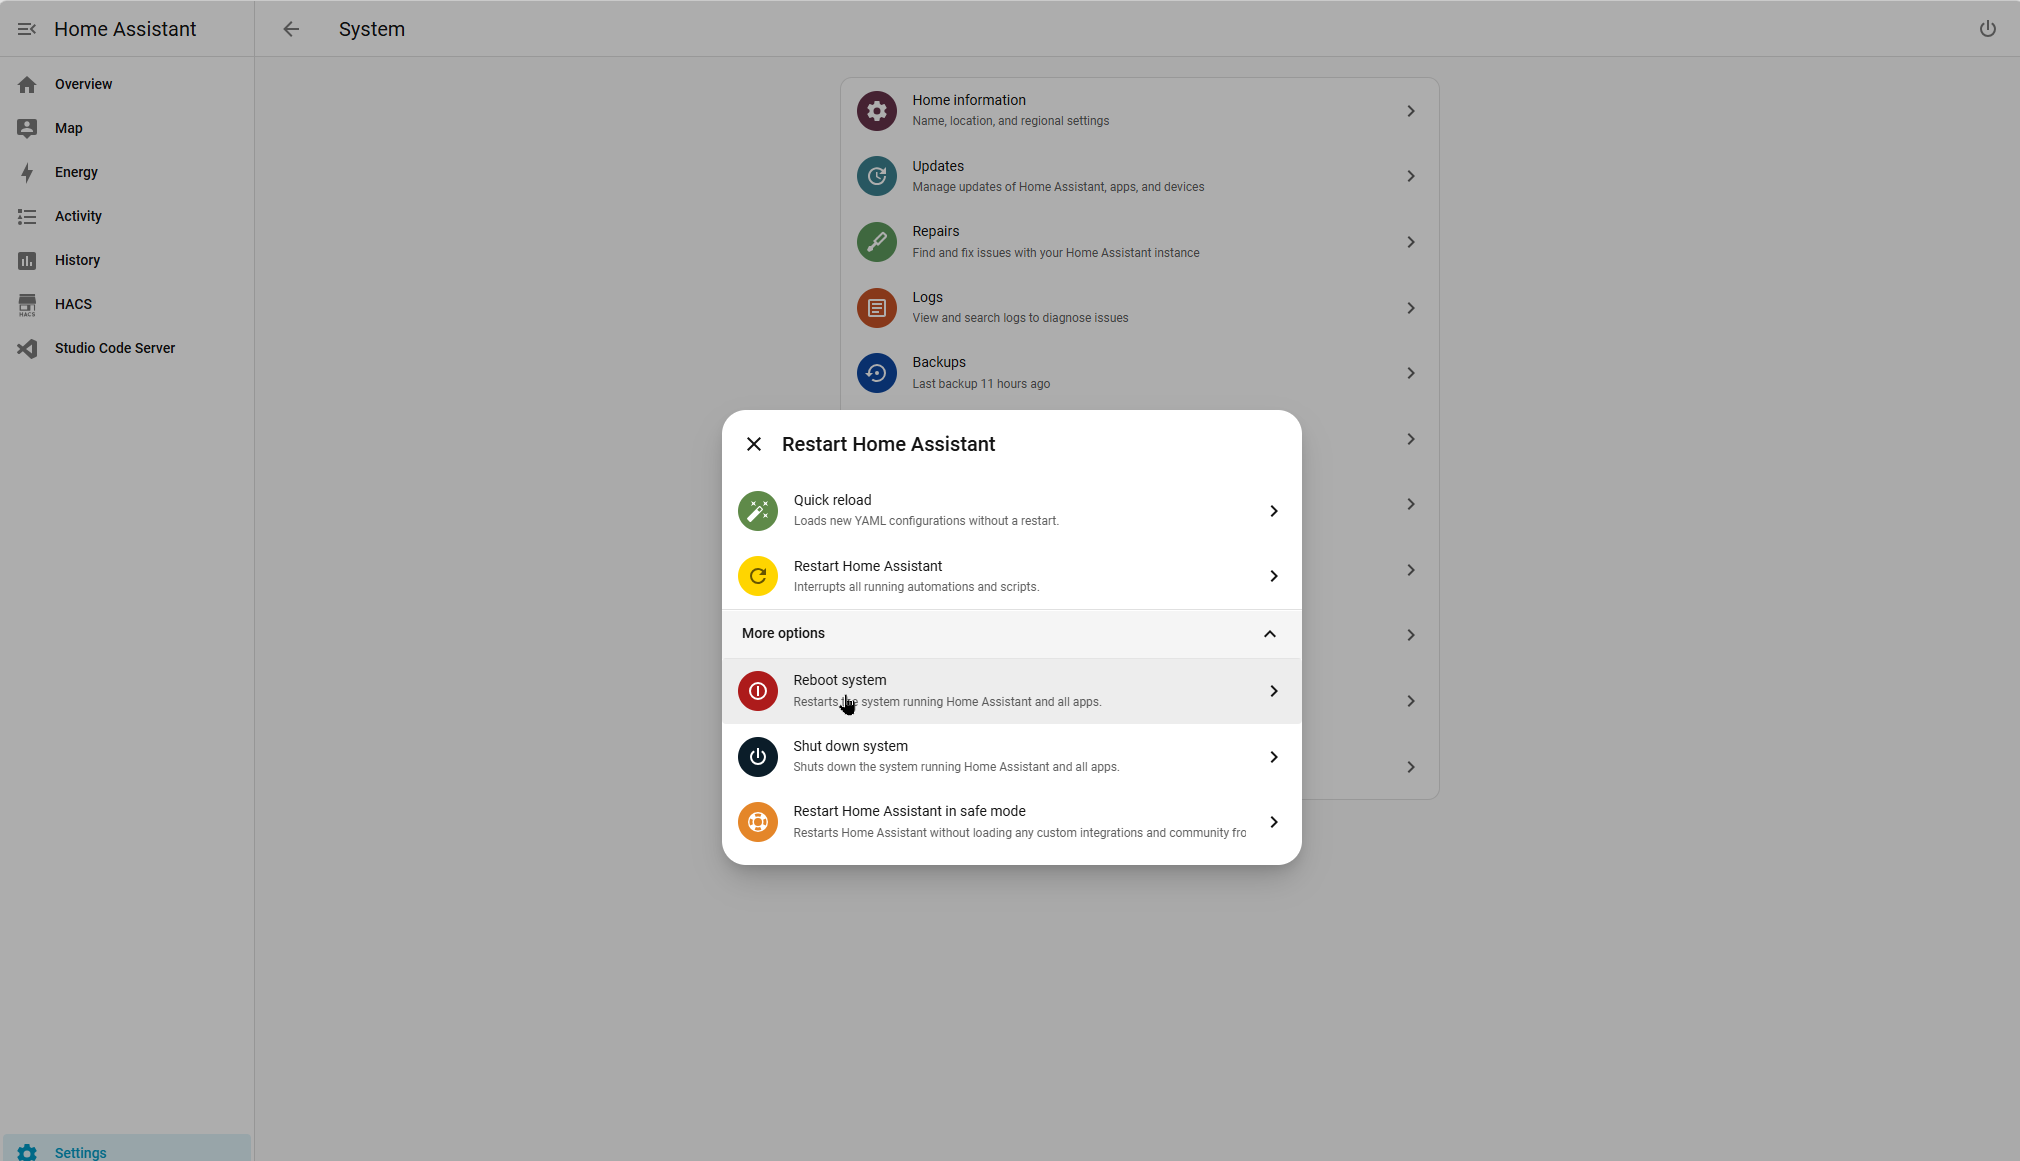
Go to Settings › System, click the power icon in the top right, and choose Restart Home Assistant.
B. Reload YAML
If packages: was already in your configuration.
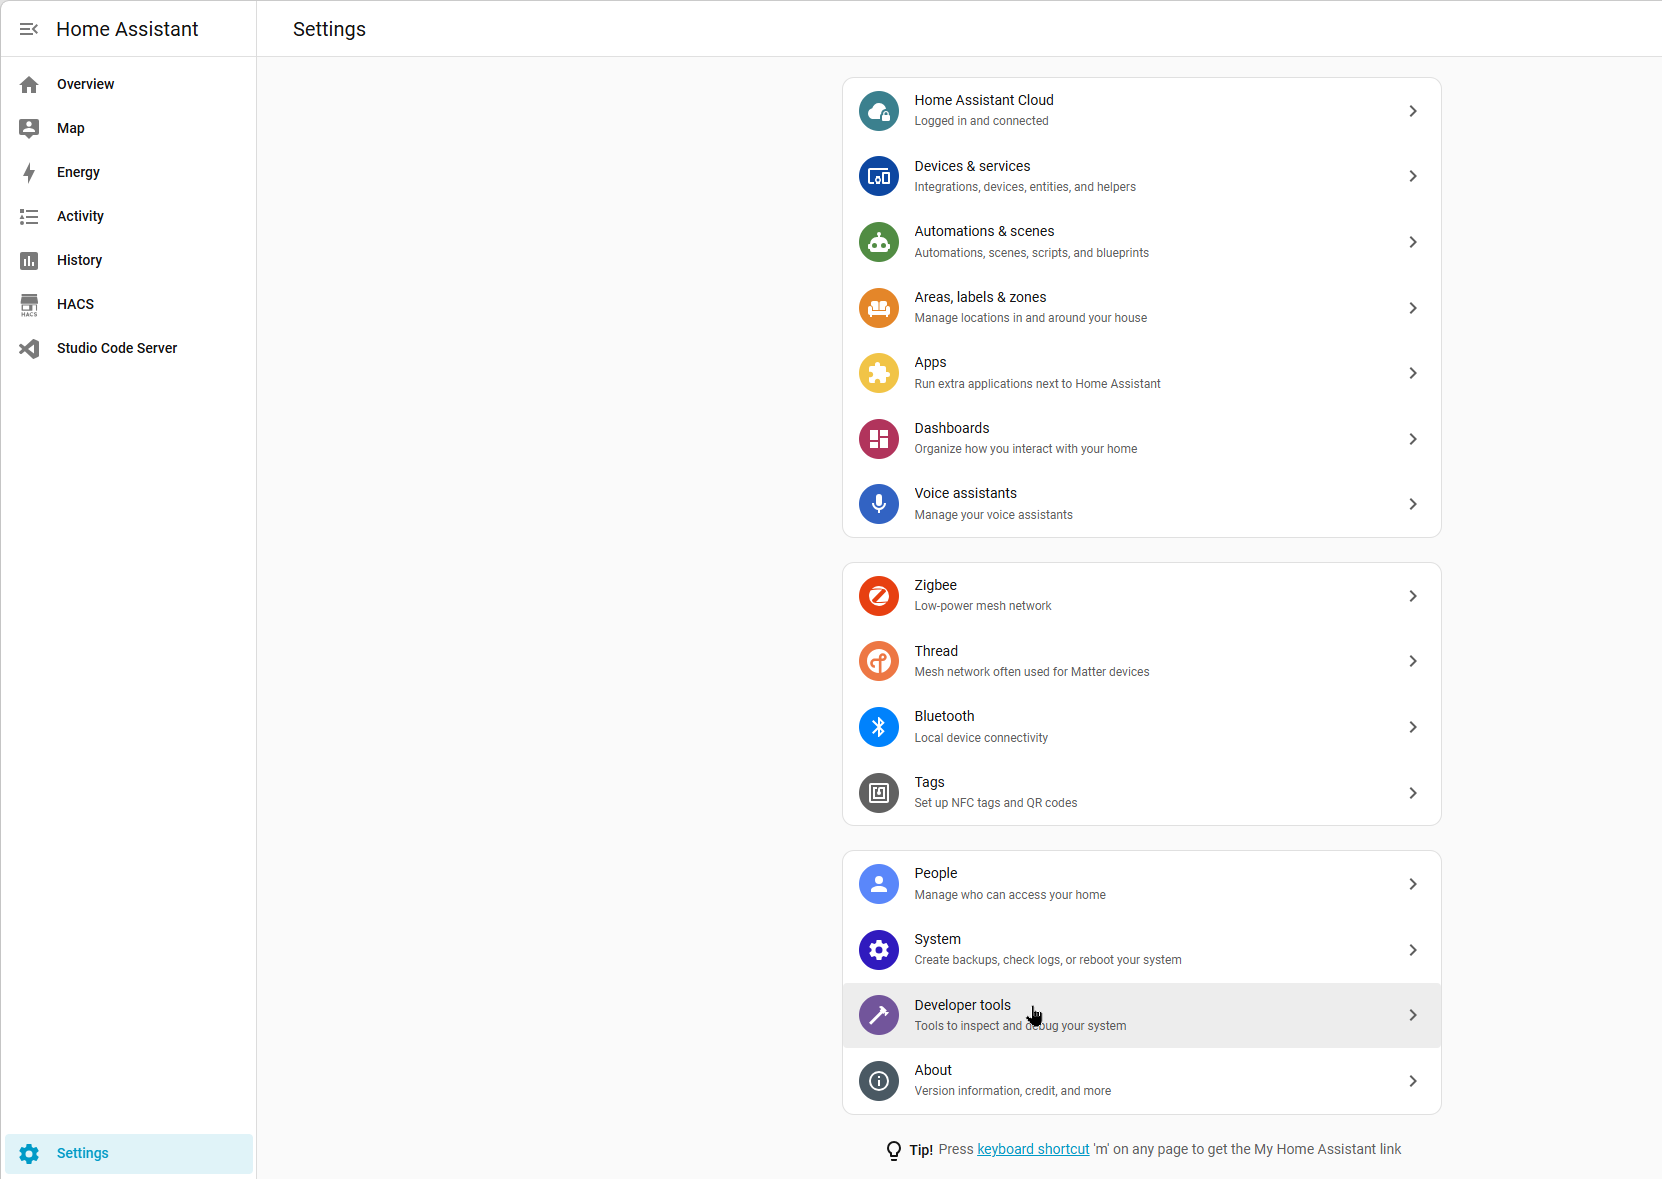
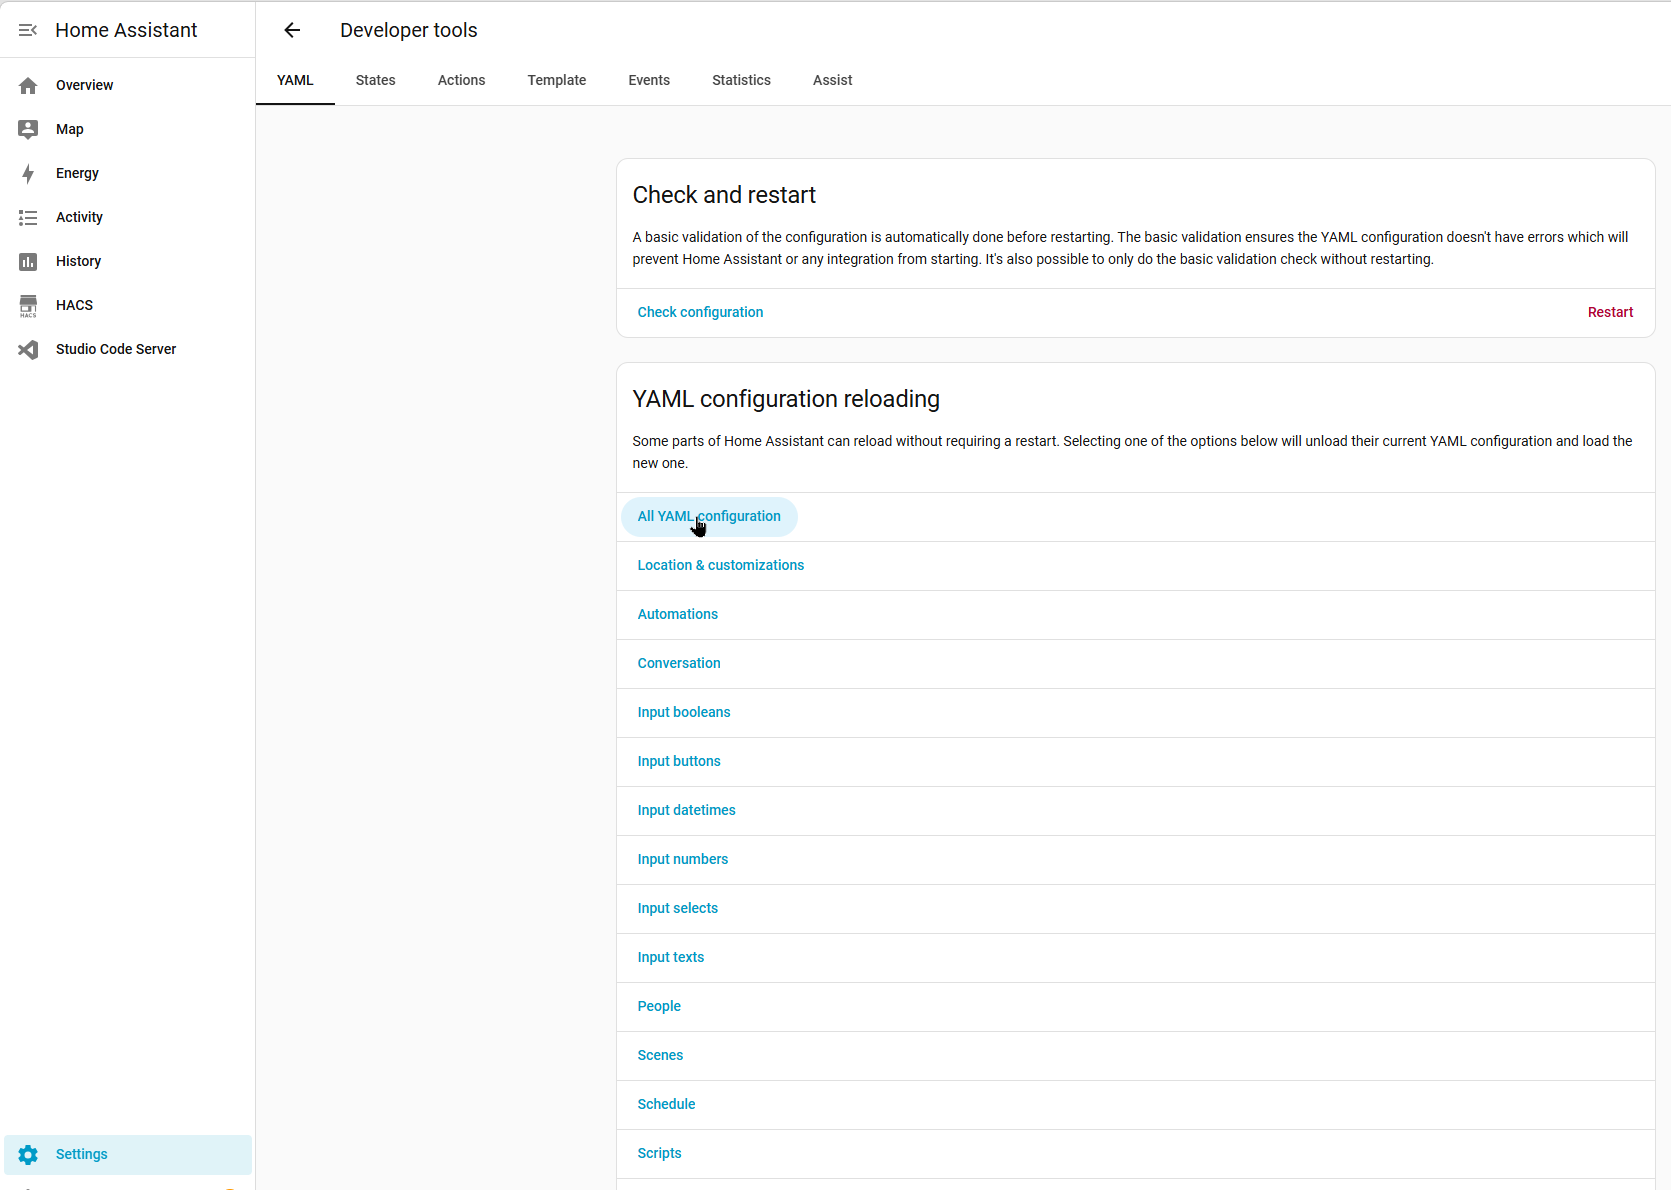
Go to Settings › Developer tools › YAML and click All YAML configuration. No restart needed.
Using it
7 Find the action
Go to Developer tools › Actions, type
ino in the search box, and pick
Inovelli Blue - Sync Config Between Switches.
If nothing comes up, the script did not load. Go back to step 6, and check
that the file is inside packages and named exactly
inovelli_blue_sync.yaml.
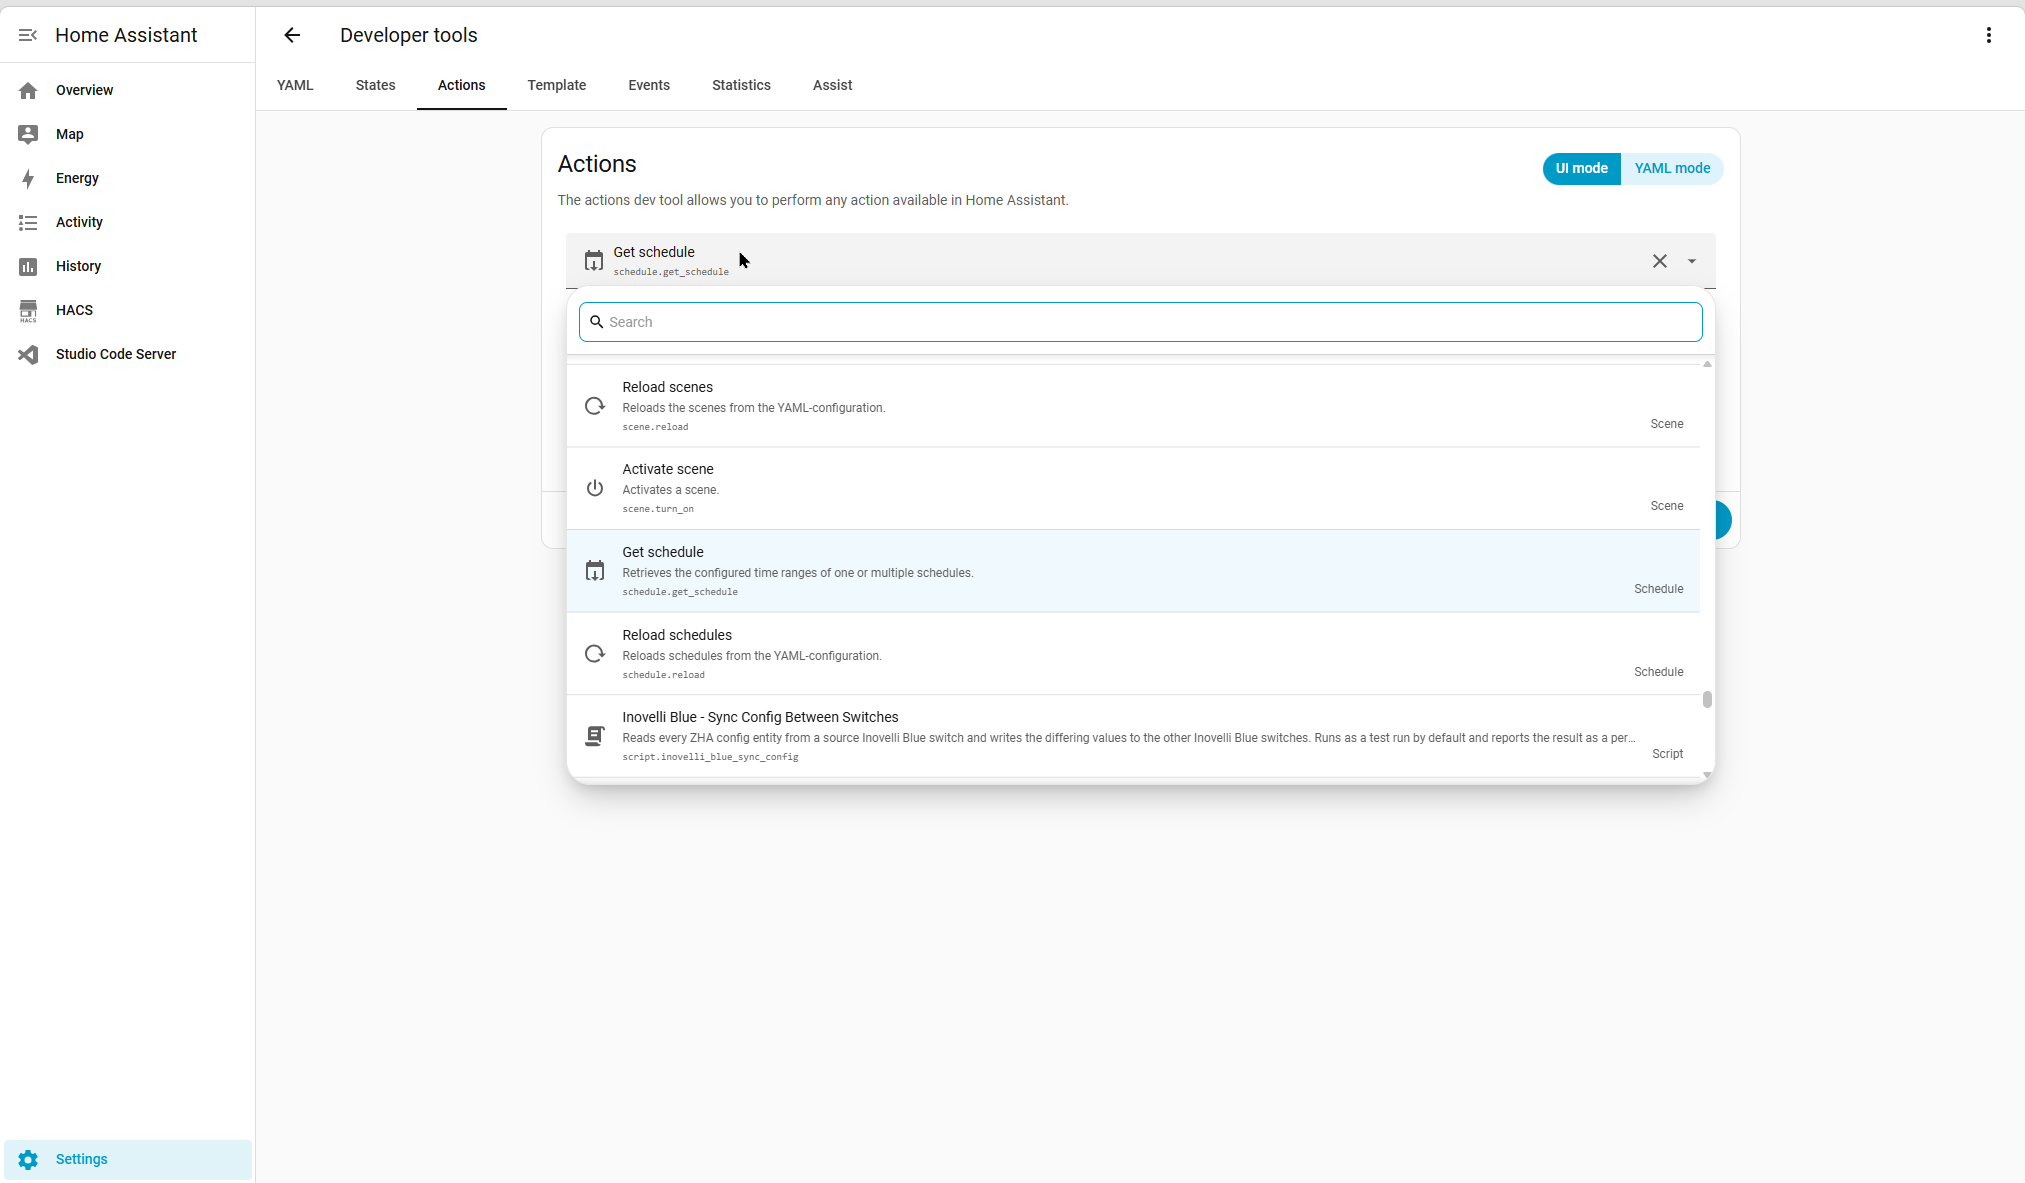
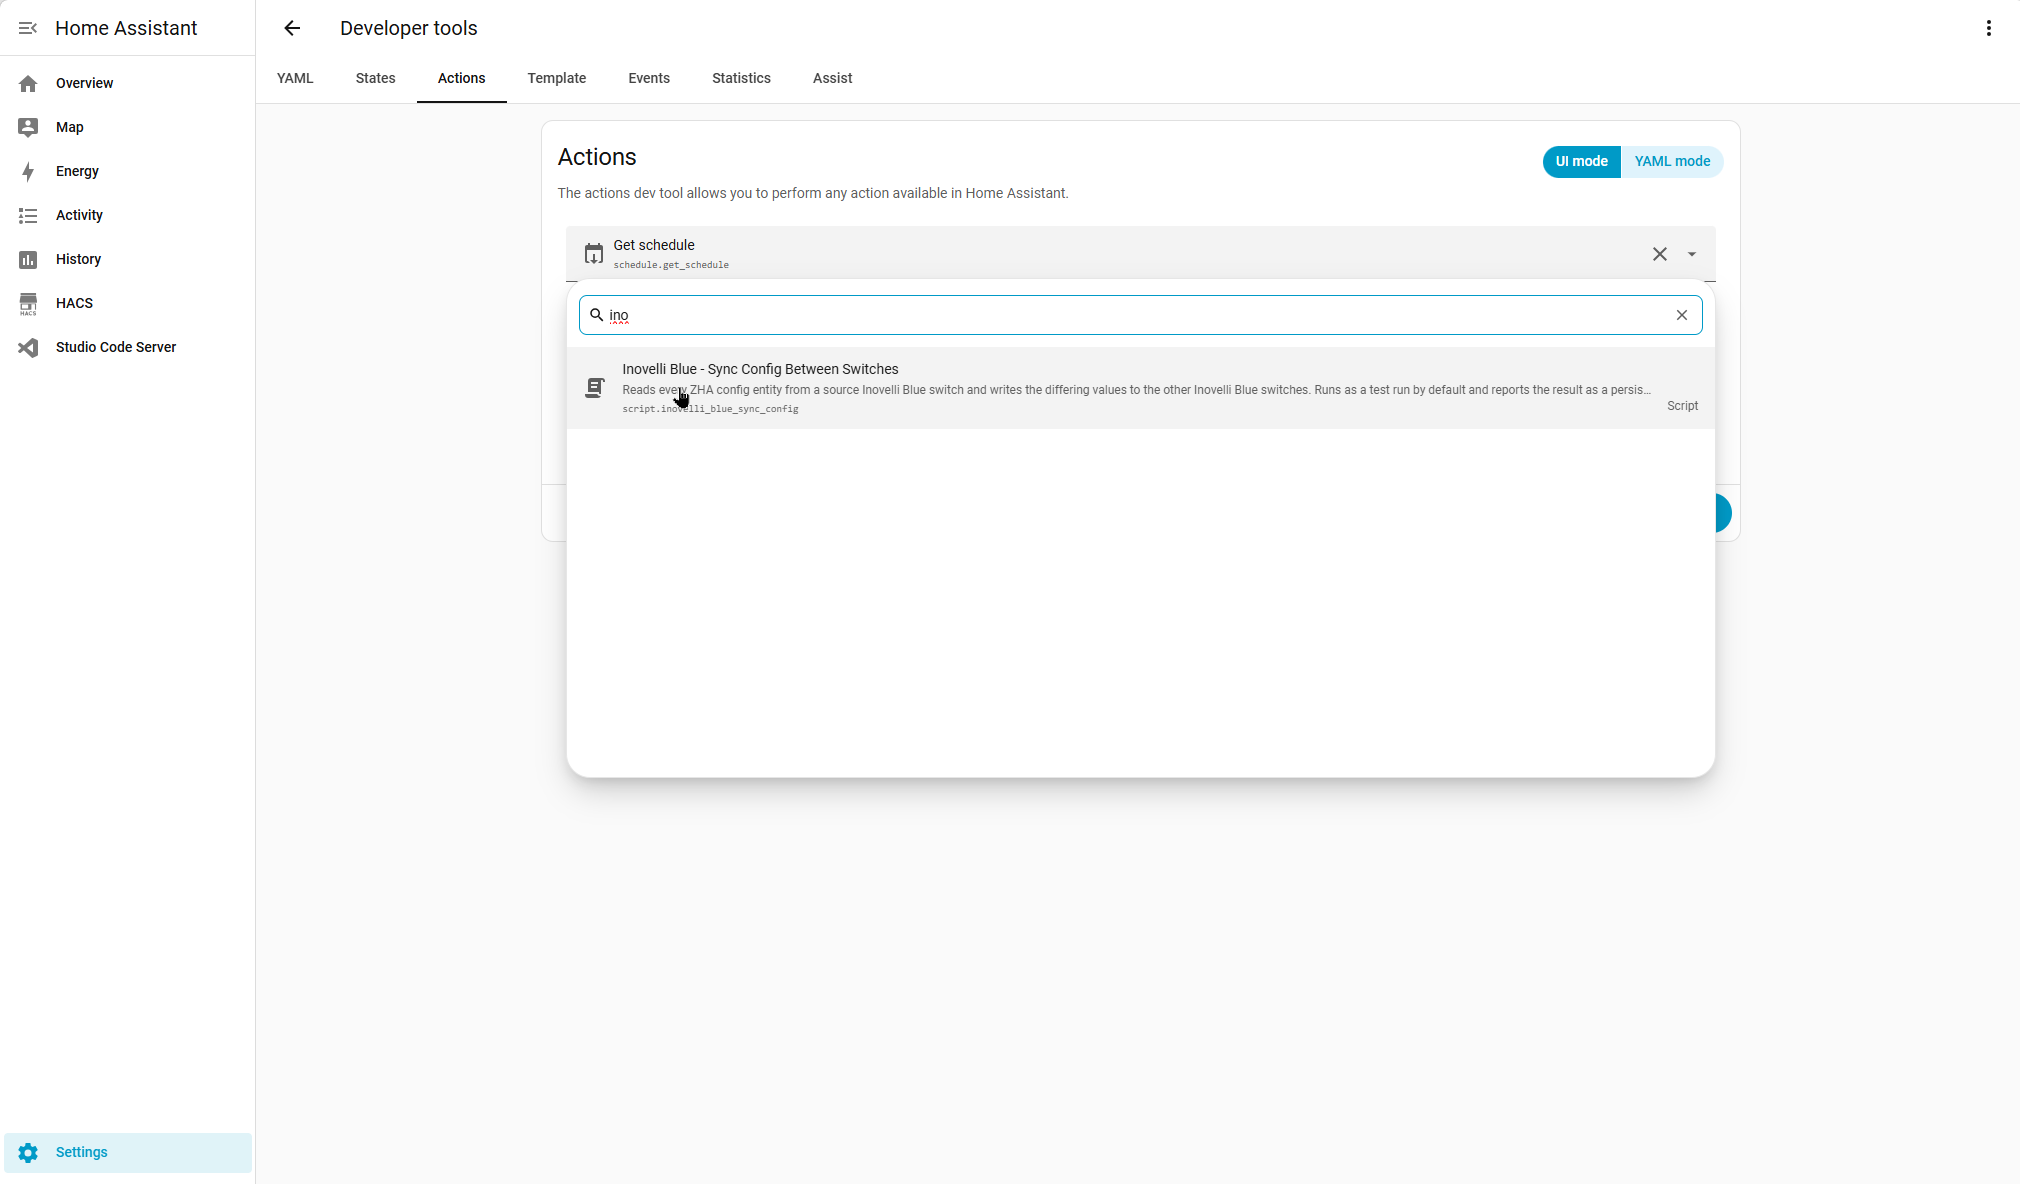
ino narrows it to the one action.
8 Pick the switch to copy from
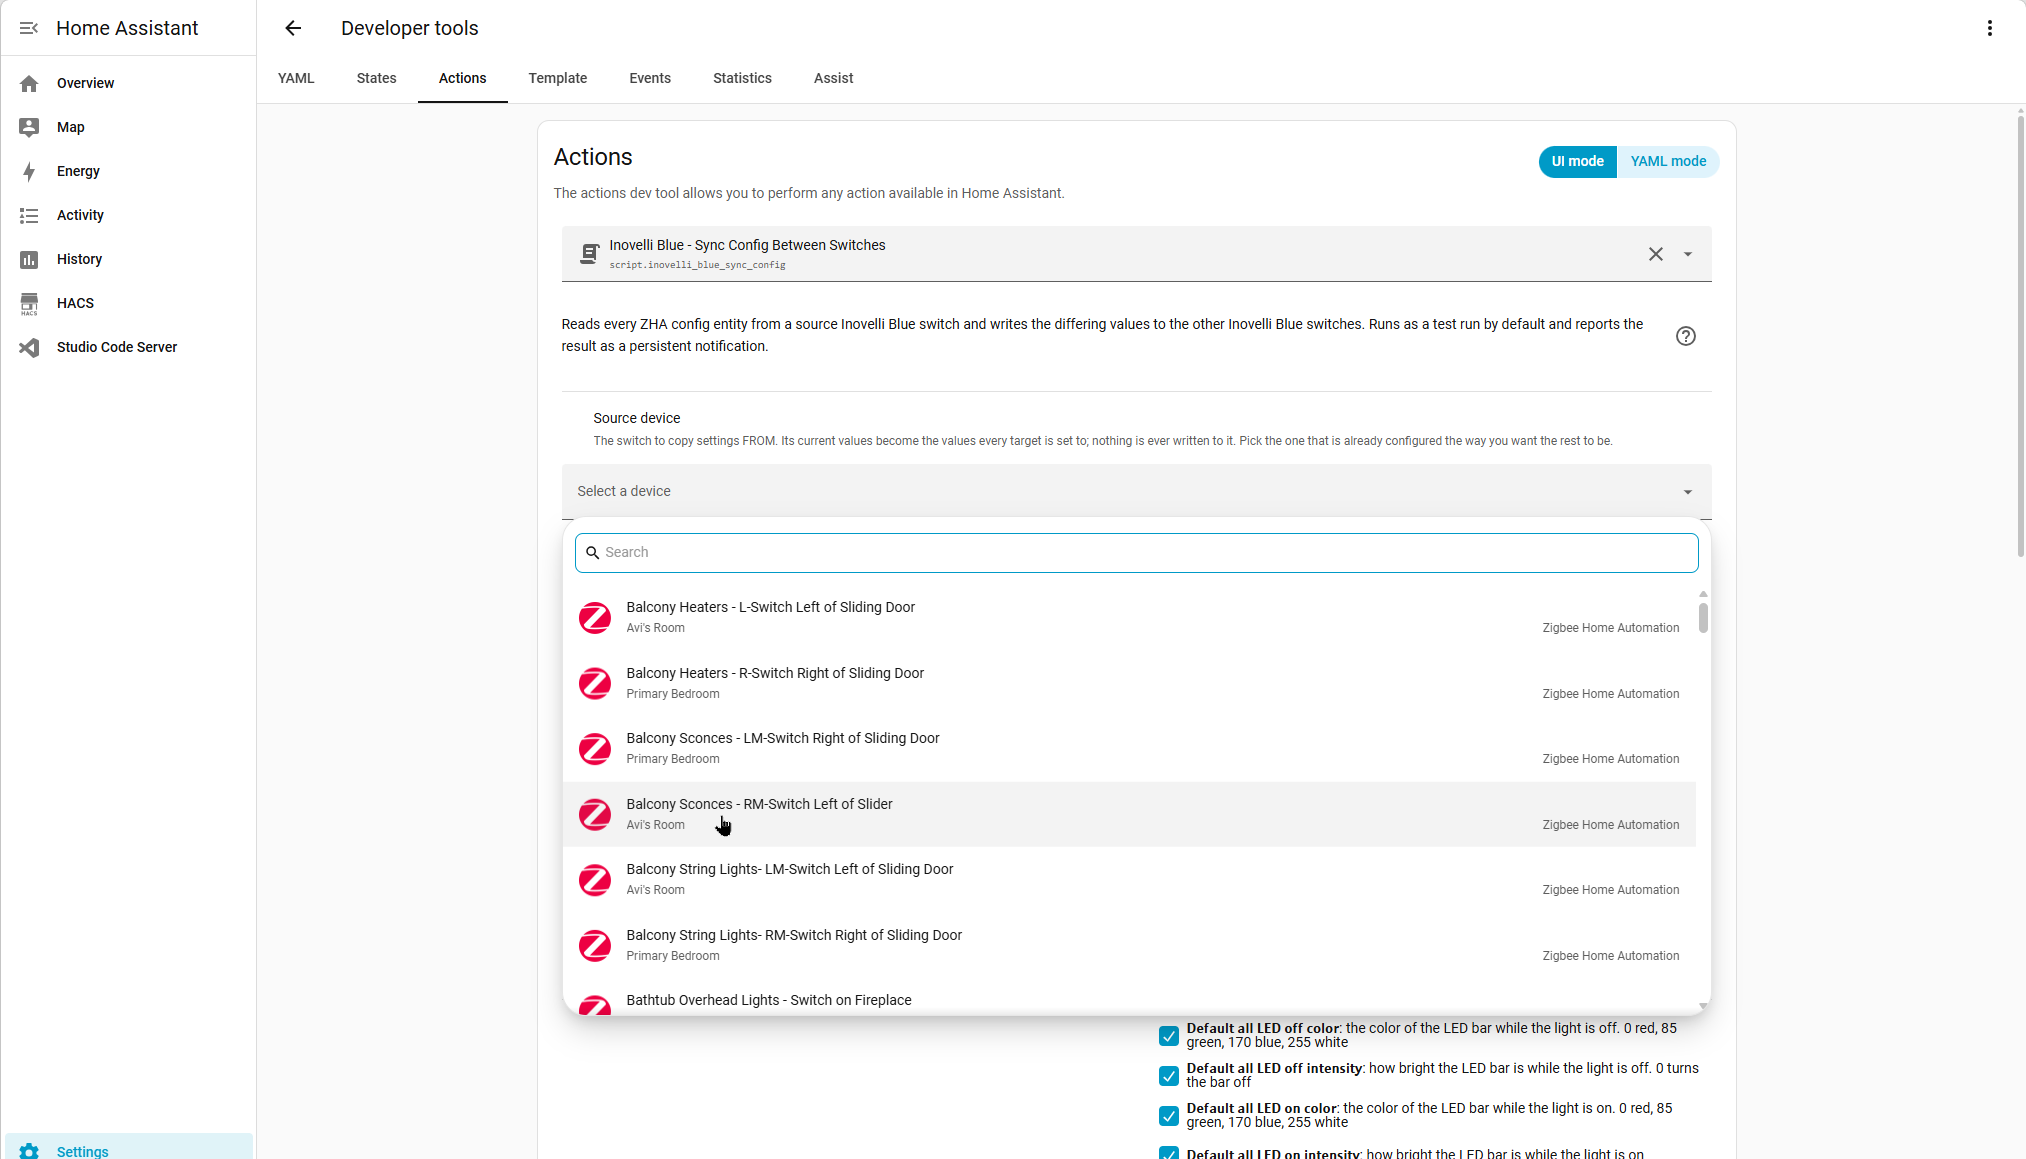
Under Source device, choose the switch whose settings you want every other switch to match. Its current values become the values every target is set to; nothing is ever written back to it. Pick the one that is already configured the way you want the rest to be.
Below that are the checkboxes for which groups of settings to copy. The defaults are sensible, so you can leave them alone the first time.
9 Run it as a test, then for real
Scroll to the bottom. Test run sits just above the Perform action button and is on by default. Leave it on and press Perform action.
Nothing is written. You get a notification and a response listing how many switches are out of sync, how many settings that comes to, and what would change on each switch. Read it over, adjust the checkboxes, and run it again as often as you like until the plan looks right.
When you are happy with it, turn Test run off and press Perform action again. This time it writes the changes, reads every switch back to confirm each one took, and reports what actually happened.
Going further
The README documents every setting and its Inovelli parameter number, what each field in the form does, how the report is put together, which three settings are deliberately never written and why, and what to do when a write does not stick.